Use the Payments section in the organisation management module to view, group, manage and receipt fees for organisations that sponsor the education of learners. The managing and grouping of sponsor fees is achieved through the use of invoicing, crediting of fees and the refunding of receipts.
Sponsor fees are both learner and enrolment based, and assigned to the organisation during the enrolment process. They can be assigned in a number of processes in Central, including enrolments, bulk enrolments, reservations, block progressions, enrolment roll-forward and in Ontrack Learner Hub.
An asterisk is displayed on the Payments tab where there are unsaved records that require saving before being committed.

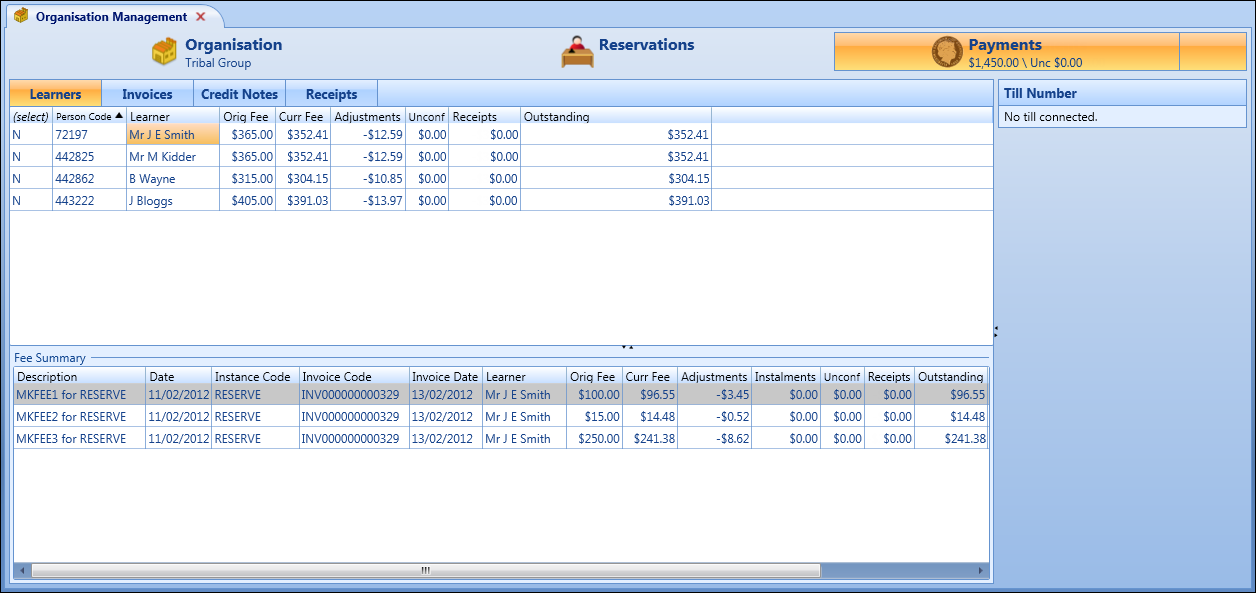
The Payments section displays a breakdown of learners, along with their original and any outstanding fees that the sponsoring organisation owes the institution. You can receipt learner fees, create invoices and credit invoiced learner records from this tab.
The Payments section consists of the following:
- Total outstanding fees owed to the institution by the organisation
- The Learners, Invoices, Credit Notes and Receipts tabs where fees are grouped, managed and receipted
- Learners with sponsored fees associated with an organisation (these records show the original, current, adjusted, receipted and outstanding values as a collection of learner fees in the Fee Summary grid)
- Individual learner and enrolment sponsor fees associated with the selected learner record (these records show the original, current, adjusted, receipted and outstanding values including GST on a per fee basis in the Fee Summary grid)
- Machine till number if associated with a till
From the Payments screen, you can:
Use the Learners tab in the Payments section to create receipts.
To create a receipt:
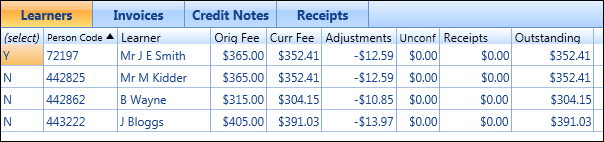
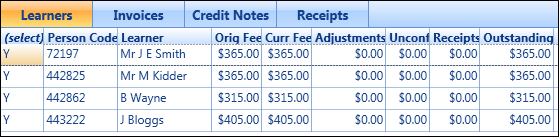
- Select the Learners tab.
-
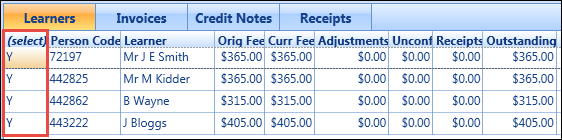
In the (select) column, select the required learner.
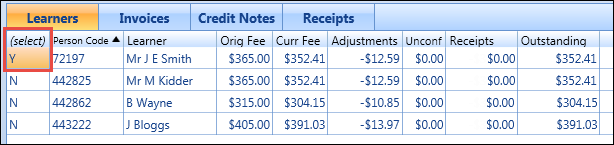
-
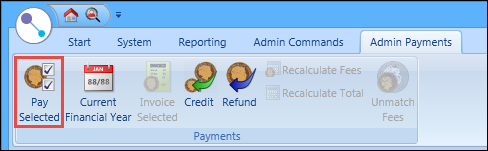
Select the Pay Selected button on the Admin Payments ribbon.
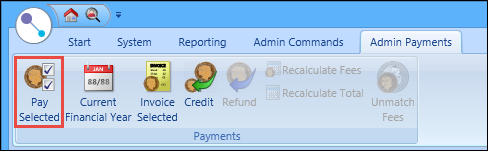
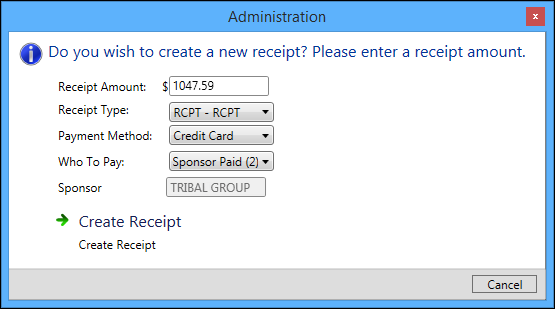
The Administration window is displayed with the amount required to pay populated in the Receipt Amount field.

- Complete the fields on the Administration window.
The fields on the Administration window are described in the following table.
| This field | Holds this information... |
|---|---|
| Receipt Amount |
The value determined by the addition of the fees associated with the selected learners. Important.This value cannot be edited in order to prevent the creation of unmatched receipts.
|
| Receipt Type | The type of receipt. Select from the drop-down list. |
| Payment Method |
The payment method. Select from the drop-down list. Important.The payment methods available in the drop-down list are those where the context is set to Receipt .
|
| Who To Pay |
Who is responsible for the fees due. Select from the drop-down list. Important.The source of fee values available in the drop-down list are those where the balance to update is set to Sponsor .
|
| Sponsor |
The sponsor (that is: organisation code) is automatically populated. Important.This value cannot be edited to indicate that the learner and enrolment fees are associated with the sponsor.
|
-
Select Create Receipt .
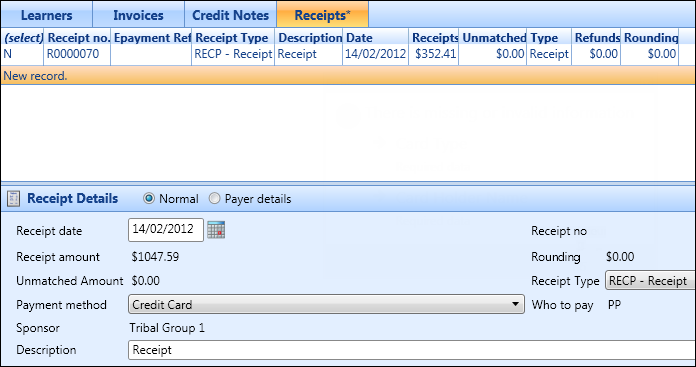
A new receipt record is created with the details displayed in the Receipt Details section of the Receipts tab.
-
If required, select the Payer Details option, and then complete the payment details.
 Important.A prompt is displayed if you try to save the receipt before completing the required fields on the Payer Details pane. If the payment method does not have any associated payer details, the save is completed. If required, you can also change the payment method before saving.
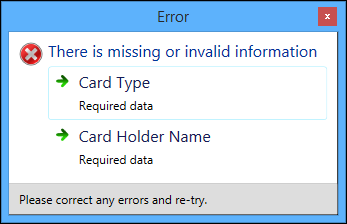
-
Select Save .
The receipt is saved with the type set to Receipt .

Use the Learners tab in the Payments section to create invoices.
To create an invoice:
- Select the Learners tab.
-
In the (select) column, select the required learner(s).
-
Select the Invoice Selected button on the Admin Payments ribbon.
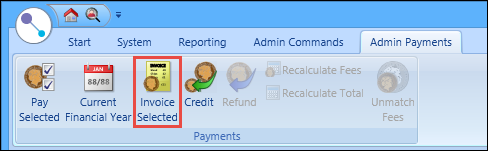
The accumulated total sponsor fees from each learner selected display on a single unique invoice record on the Invoices tab.

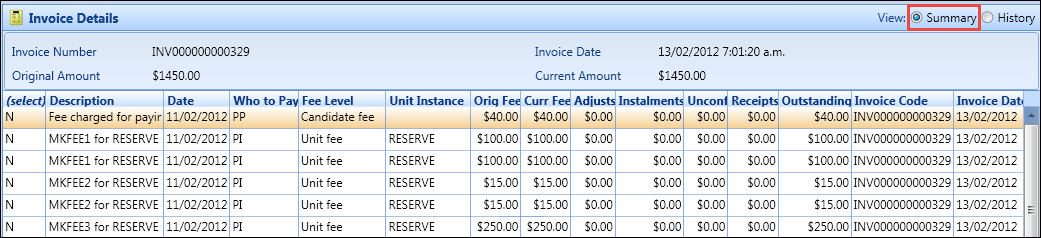
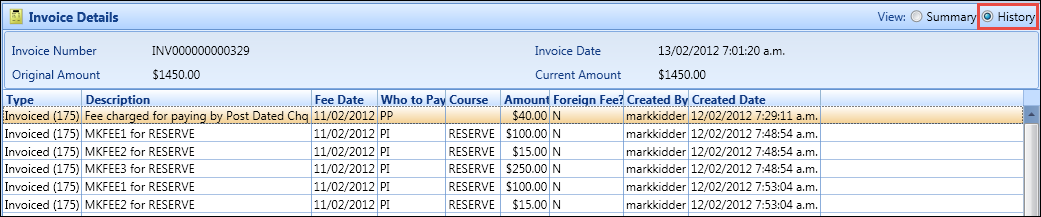
The Invoice Details section is displayed at the bottom of the Invoices tab and provides a Summary and History view of the invoice record which can be changed from the appropriate options.
The Summary context in the Invoice Details section shows a list of sponsor fees that constitute the invoice record. Each sponsor fee is broken down to show how the different transactions including fee adjustments, instalments, credit notes and receipts have affected the individual fees on an invoice.
The History context in the Invoice Details section shows a detailed list of transactions by type, which have affected the individual fees found on the invoice. The different transactions include invoiced, credit note and receipt records.
Use the Learners and Invoices tabs in the Payments section to create credit notes. Credit notes can be created on the Learners tab by selecting learner records that are invoiced with current fee values remaining or on the Invoices tab by selecting an active invoice that has an outstanding amount.

A credit in the context of an invoice, is a monetary value that is the same or lower amount than that of the invoice. Credits adjust the outstanding amount and create unmatched receipts where the value receipted prior to the credit is greater than the amount owed. Multiple credit notes can be applied to an invoice record.
To create a credit note on the Invoices tab:
- Select the Invoices tab.
-
In the (select) column, select the required invoice.

-
Select the Credit button on the Admin Payments ribbon.

The Administration window is displayed.
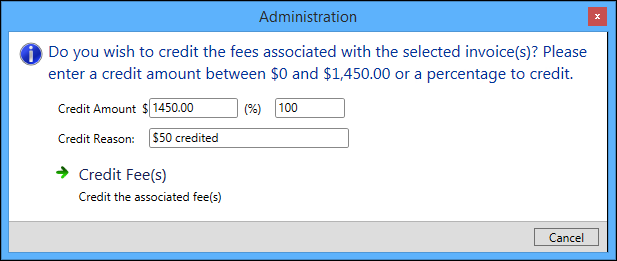
- Complete the fields on the Administration window.
The fields on the Administration window are described in the following table.
| This field | Holds this information... |
|---|---|
| Credit Amount ($) |
The monetary amount that the selected invoice will be credited by. Important.The value entered cannot exceed the outstanding amount on the invoice.
|
| Credit Amount (%) | The percentage of the selected invoice's outstanding amount that will be credited. |
| Credit Reason | The reason for the creation of the credit note. |
-
Select Create Fees .
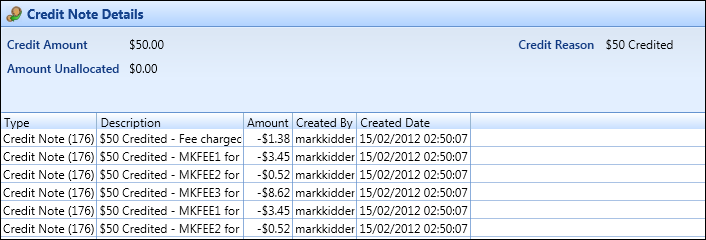
The credit note is created and displayed on the Credit Notes tab.
Important.Credit notes are associated with invoices from the invoice number.
The Credit Note Details section displays how credit amounts are deducted proportionally from each fee.
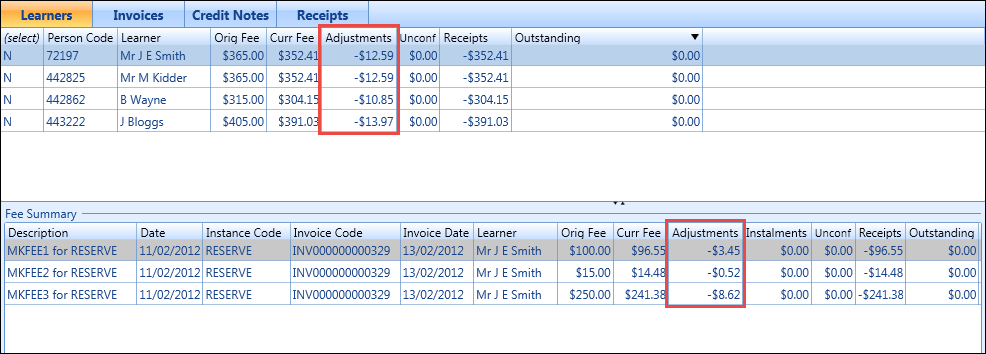
The crediting of invoices is displayed in the Adjustments column for learner and fee records associated with a particular invoice on the Learners tab.
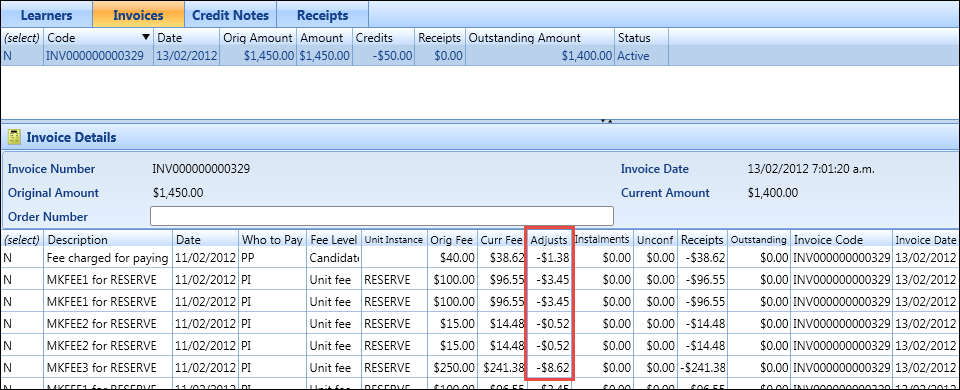
Invoices display associated credit notes in the Adjusts column for individual fees that form the invoice on the Invoices tab.
Use the Invoices tab in the Payments section to receipt invoices.

To receipt an invoice:
- Select the Invoices tab.
-
In the (select) column, select the required invoice.

-
Select the Pay Selected button on the Admin Payments ribbon.
The Administration window is displayed.
- Complete the fields on the Administration window.
The fields on the Administration window are described in the following table.
| This field | Holds this information... |
|---|---|
| Receipt Amount |
The value determined by the addition of the fees associated with the selected receipts. Important.This value cannot be edited in order to prevent the creation of unmatched receipts.
|
| Receipt Type | The type of receipt. Select from the drop-down list. |
| Payment Method |
The payment method. Select from the drop-down list. Important.The payment methods available in the drop-down list are those where the context is set to Receipt .
|
| Who To Pay |
Who is responsible for the fees due. Select from the drop-down list. Important.The source of fee values available in the drop-down list are those where the balance to update is set to Sponsor .
|
| Sponsor |
The sponsor (that is: organisation code) is automatically populated. Important.This value cannot be edited to indicate that the learner and enrolment fees are associated with the sponsor.
|
-
Select Create Receipt .
A new invoice receipt record is created with the details displayed in the Receipt Details section of the Receipts tab.
-
If required, select the Payer Details option, and then complete the payment details.
A prompt is displayed if you try to save the receipt before completing the required fields on the Payer Details pane. If the payment method does not have any associated payer details, the save is completed. If required, you can also change the payment method before saving.
-
Select Save .
The invoice receipt is saved with the type set to Receipt .

Use the Receipts tab in the Payments section to refund matched receipts.

To refund a receipt:
- Select the Receipts tab.
-
In the (select) column, select the required receipt.

-
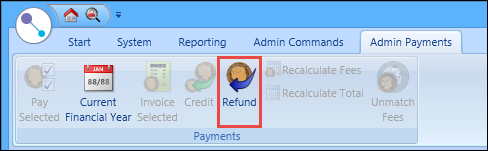
Select the Refund button on the Admin Payments ribbon.
The Administration window is displayed.
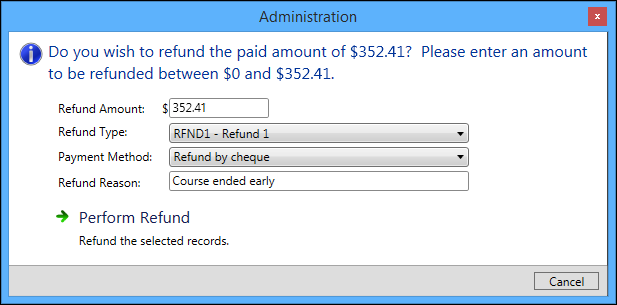
- Complete the fields on the Administration window.
The fields on the Administration window are described in the following table.
| This field | Holds this information... |
|---|---|
| Refund Amount |
The value determined by the addition of the fees associated with the selected receipts. The refund amount is defaulted to the maximum value receipted. Important.This value can be edited but cannot be greater than the amount receipted.
|
| Refund Type | The type of refund. Select from the drop-down list. |
| Payment Method |
The payment method. Select from the drop-down list. Important.The payment methods available in the drop-down list are those where the context is set to Refund .
|
| Refund Reason | The reason for the refund. |
-
Select Perform Refund .
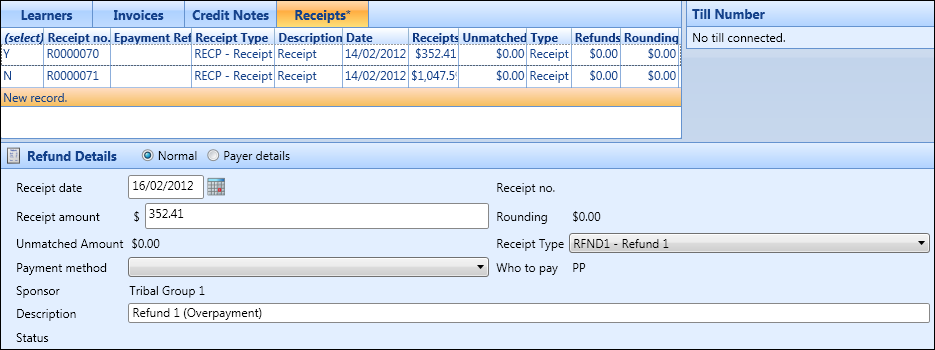
A new refund receipt record is created with the details displayed in the Receipt Details section of the Receipts tab.
-
If required, select the Payer Details option, and then complete the payment details.
 Important.A prompt is displayed if you try to save the refunded receipt before completing the required fields on the Payer Details pane. If the payment method does not have any associated payer details, the save is completed. If required, you can also change the payment method before saving.
-
Select Save .
The refunded receipt is saved with the type set to Refund . The refunded value is also added to the outstanding fees displayed on the Payments tab for the organisation.
 Important.Refunds are displayed as outstanding fees for individual learners on the Learners tab. The History view of an invoice record also displays the refund transactions against the fees refunded.